
If you want to get the most out of your Facebook campaigns, CAPI is practically a necessity today. In this article, we will show you how you can set up CAPI for WordPress and Eshops on BUXUS.

Conversion API (CAPI) is a solution from Meta that allows you to send event data from your website directly to Facebook servers. Unlike the classic pixel, which depends on the browser and cookies and can be blocked (for example, due to adblock), CAPI is a solution that works at the server level. This means you get:
- more accurate data about user behavior,
- more stable measurement even with blocked ads,
- better campaign optimization thanks to reliable information.
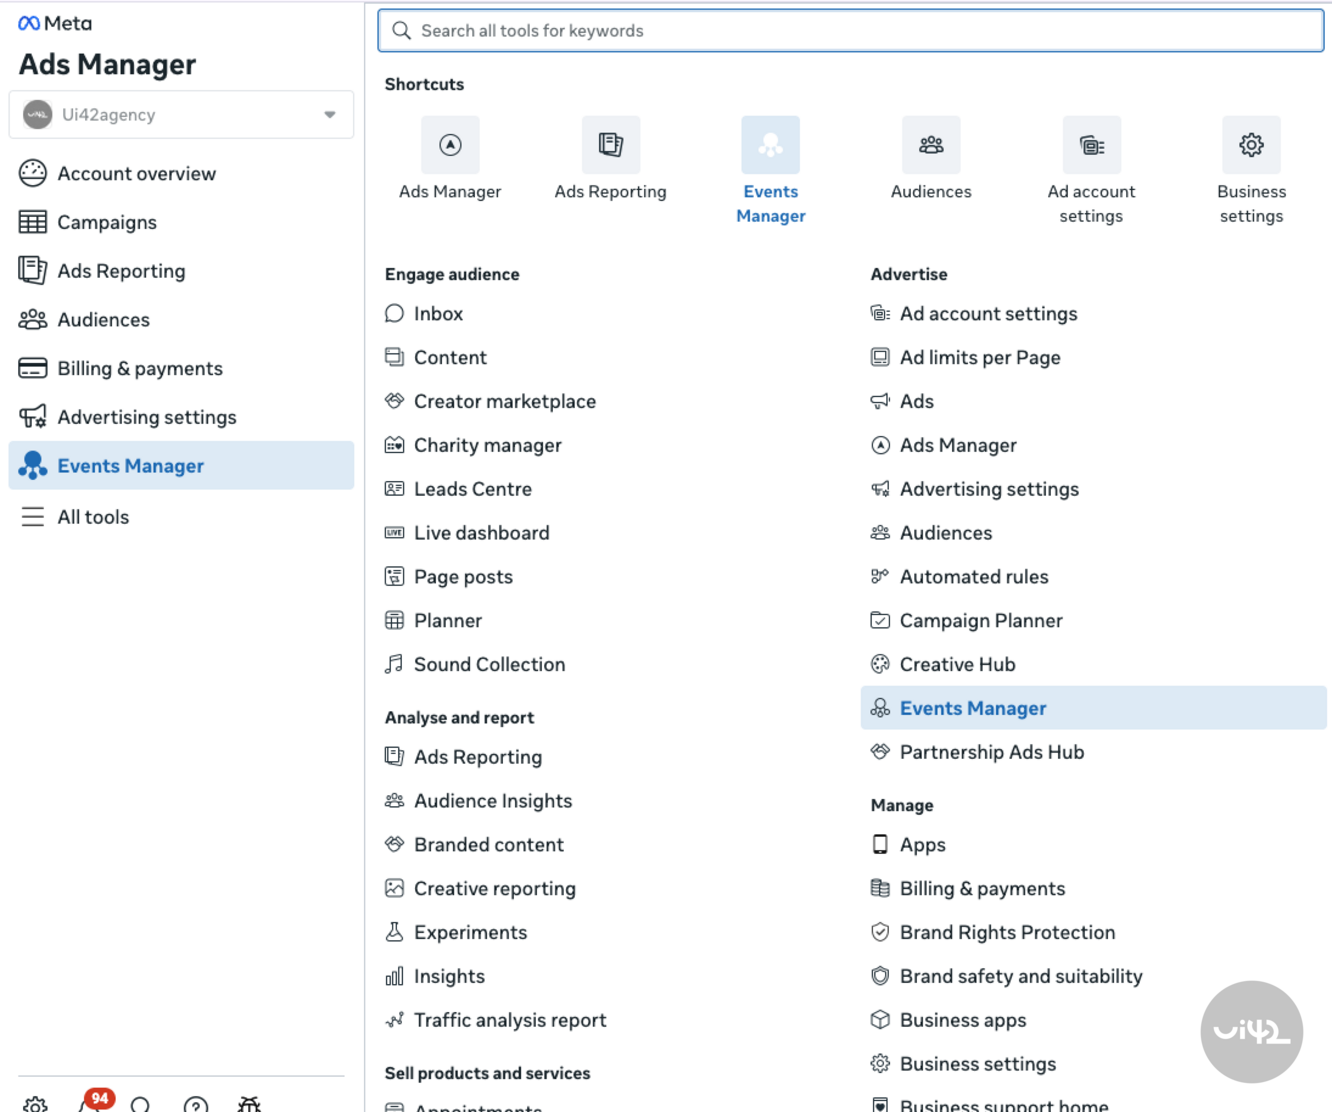
1. Selecting a Partner in Facebook Business Manager
- In Business Manager, open All Tools and go to Events Manager.
2. In the left menu, click on Data Sources.
3. Select the pixel you have implemented on the website.
4. Go to Settings and in the Conversion API section, click on Choose a partner.
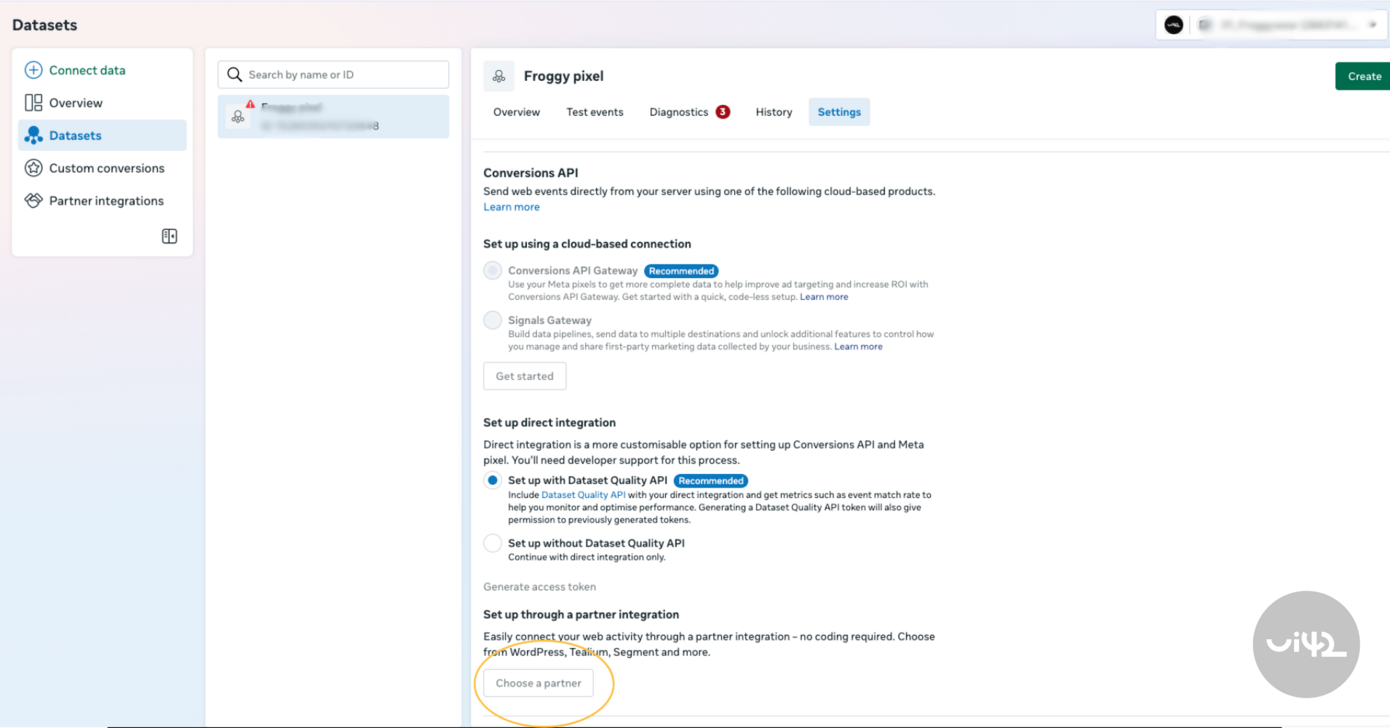
5. From the list of partners, select WordPress.
The plugin that Meta offers you to download does not need to be addressed – we will show a simpler installation below. Leave this window open, you will still need it.
2. Installing the Plugin in WordPress
- Log in to the WordPress administration.
- In the menu, click on Plugins → Add New.
- In the search, type Meta pixel for WordPress.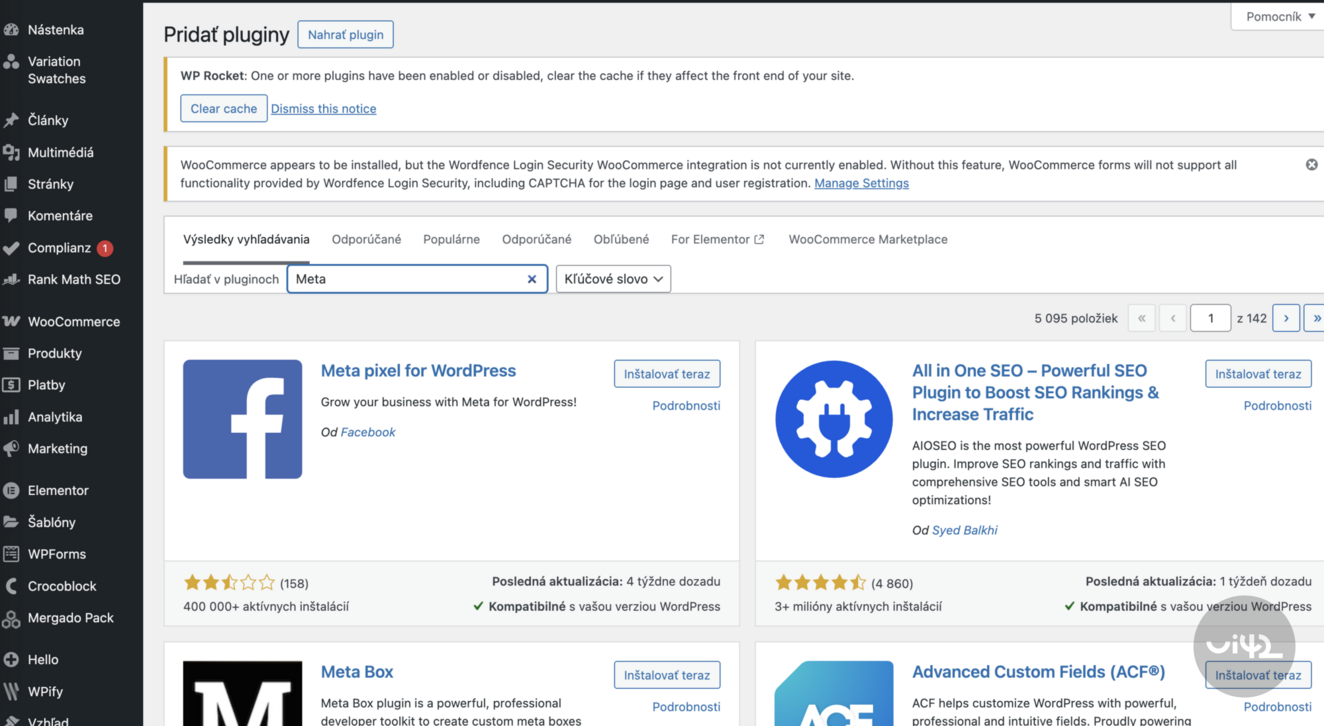
a) Install and activate the plugin
b) In the list of installed plugins, find Meta Pixel for WordPress and go to its settings.
c) Click on Get Started and gradually go through the simple steps where you select:
- the Facebook page for the website,
- Instagram profile (if you don't have one, choose the skip option),
- ad account,
- and finally the pixel.
Confirm the settings. After saving, return to Business Manager (BM).
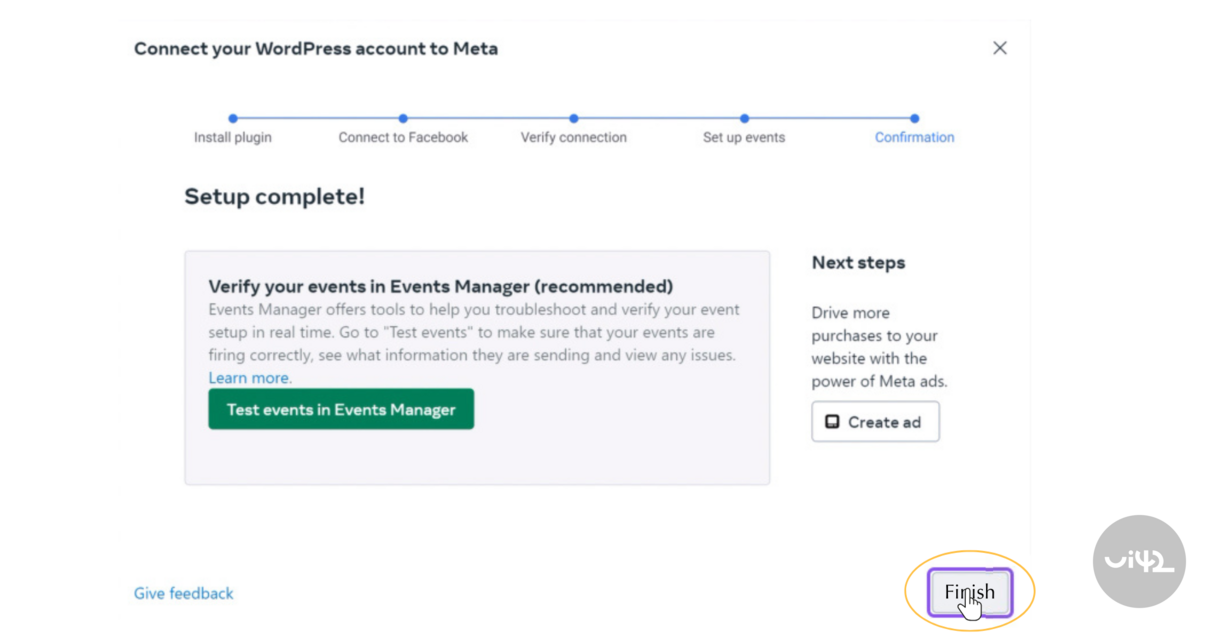
3. Verifying Event Sending in BM
- In the pixel settings, continue by clicking on Next.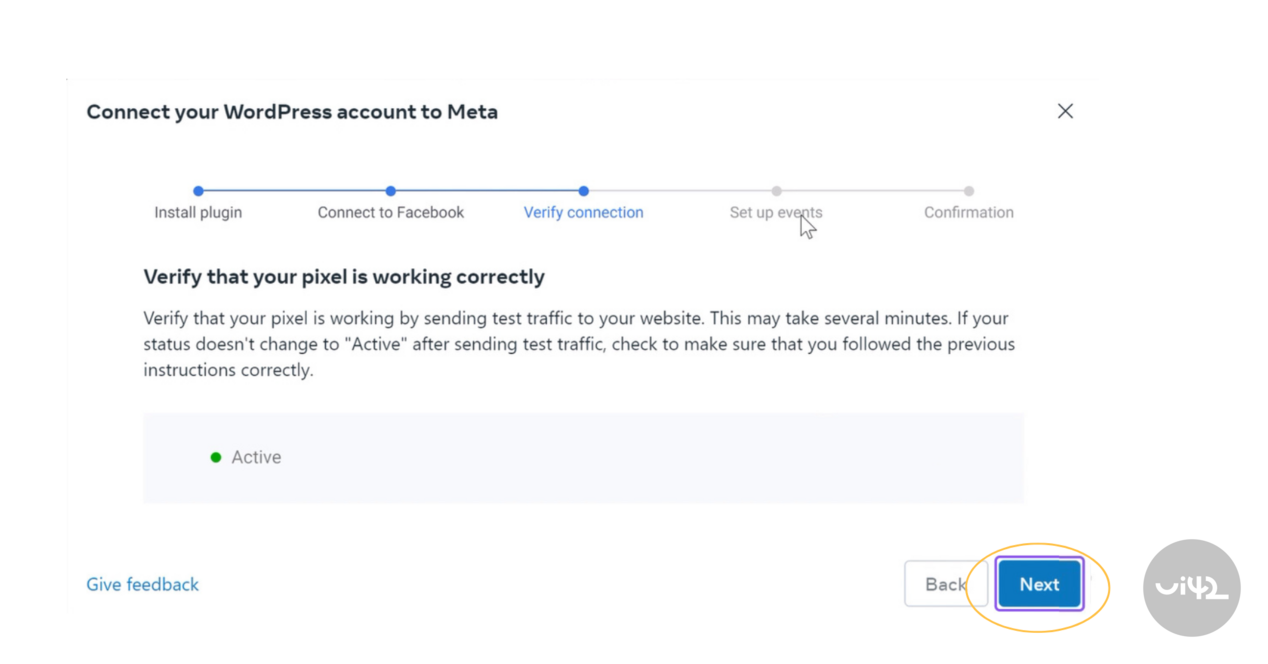
- Enter your website URL in the field and use Test Events to verify that events are being sent correctly.
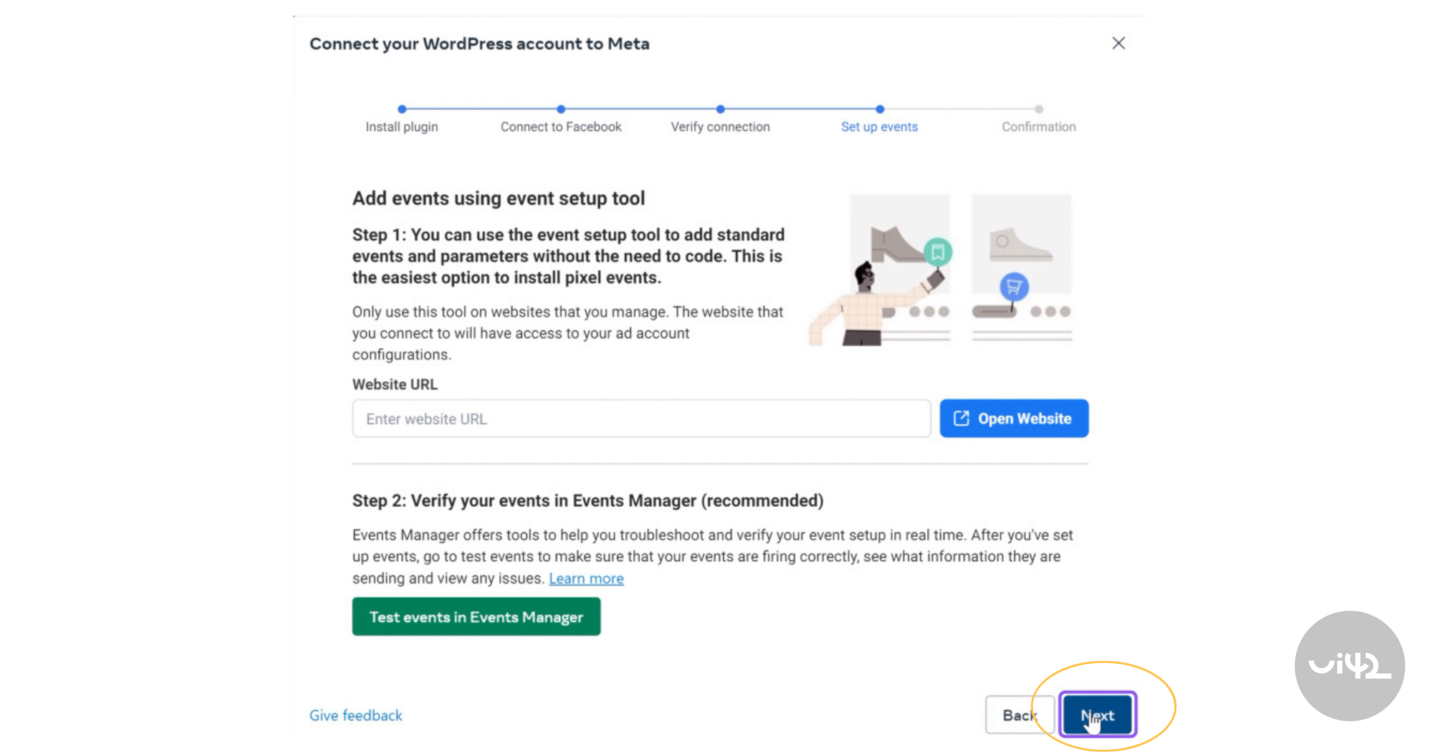
- After a successful test, click on Finish and the integration is complete.
4. CAPI on BUXUS
Unlike other platforms such as Wordpress, setting up CAPI on BUXUS is much easier for you. All you need to do is create a Pixel in Meta and send it to us. We will take care of the correct server-side tracking setup for you.